Connecting your ultrasound scanners: clinic setup guide
This guide walks a clinic team through connecting ultrasound scanners to wawa, from the settings in wawa to a test scan on each scanner. It is written for clinic managers, wawa administrators at the clinic and whoever looks after the scanners. The technical reference and the Orthanc deployment guide cover the imaging server itself, for your IT team.
When everything is set up:
- patients booked for a scan appear on the scanner's worklist, with their details filled in, and
- the measurements and images from each scan appear on the patient's record in wawa, without anyone typing them in.
The day-to-day routine is on one printable page: the scanner quick reference.
How it works
The scanners never talk to wawa directly. Everything passes through an imaging server (usually Orthanc) on the clinic network.
           1. booked scans                     2. today's patients
  wawa  ─────────────────────▶  Imaging server  ─────────────────────▶  Scanner
        ◀─────────────────────                  ◀─────────────────────
           4. collected by wawa                 3. images + measurements
- When a scan is booked in wawa, wawa sends the appointment to the imaging server.
- The scanner reads its worklist from the imaging server. The sonographer picks the patient instead of typing their details.
- At the end of the scan, the sonographer sends the images and the measurements to the imaging server.
- wawa collects them and adds them to the patient's record under Records → Ultrasound.
Steps 1 and 2 (worklists) are optional and need an Orthanc server. Without them, scans still reach wawa, but the sonographer must type the patient's wawa ID on the scanner exactly as it appears in wawa.
Images and measurements are two separate sends
This is the single most important thing to understand when something goes wrong.
| Images | Measurements | |
|---|---|---|
| What it is | The ultrasound pictures | A Structured Report (SR): follicle sizes, endometrium, CRL and so on |
| Scanner service | STORE | STR.REPORT (or the scanner's equivalent) |
| How it is sent | A key the sonographer presses (on a Voluson, usually P1) | A separate transfer (on a Voluson P8, Measurements → Transfer Data); some scanners can send it at the end of the exam |
| If it does not arrive | The scan shows in wawa with measurements but no images | The scan shows in wawa with its images and a Measurements pending badge, but no measurements |
Each send has its own destination on the scanner. Both must point at the same imaging server. A scanner whose measurement service points at the new imaging server while its image key still sends to an old destination (for example a previous reporting system) delivers measurements without images on every scan.
Which scans come into wawa
wawa reads the measurements to decide what kind of scan it is, and imports them for follicle-tracking scans (follicles, ovaries, endometrium) and pregnancy scans (for example gestational sac, CRL, fetal heart rate). Any other scan, and any scan whose measurements have not arrived, comes in with its images only and shows Measurements pending.
Who does what
| Who | Responsible for |
|---|---|
| Sonographers and nurses | Choosing the patient from the worklist, and both sends at the end of every scan (quick reference) |
| Clinic IT team or IT provider | The imaging server and clinic network, and the connection details in What you need |
| wawa administrator at the clinic (or your wawa contact) | Setting up wawa |
| Scanner supplier, or whoever looks after the scanners | Setting up each scanner. Some screens need an administrator login only the supplier has |
If your clinic has no IT team or provider, tell your wawa contact before you start.
What you need
From your IT team:
- Confirmation that the imaging server is installed, running and reachable by wawa.
- The imaging server's web address, starting
https://, for examplehttps://imaging.yourclinic.example. - The username and password wawa uses to connect.
- Whether the server is Orthanc. Automatic synchronisation and worklists both need it.
- The time zone of the site where the server and scanners are.
From the clinic:
- Your scan rooms, and which scanner is in each.
- The appointment types used to book scans.
- A test patient in wawa. Never test with real patients.
Type the imaging server's password straight into wawa yourself. Never send it by email or chat, and never give it to anyone, including wawa staff or an AI assistant. Once saved, it never needs to be typed again.
Part 1: Setting up wawa
Done once, in wawa's Settings, in about fifteen minutes.
Step 1: Open the DICOM settings
- Go to Settings → Integrations, find the DICOM card and click Configure.
- The first time, click Enable DICOM Integration.
You will use the DICOM Servers, Clinic Assignments, Worklist Groups and Events tabs. Leave the Configuration tab as it is unless your IT team asks otherwise.
Step 2: Add your imaging server
On DICOM Servers, click Add DICOM Server.
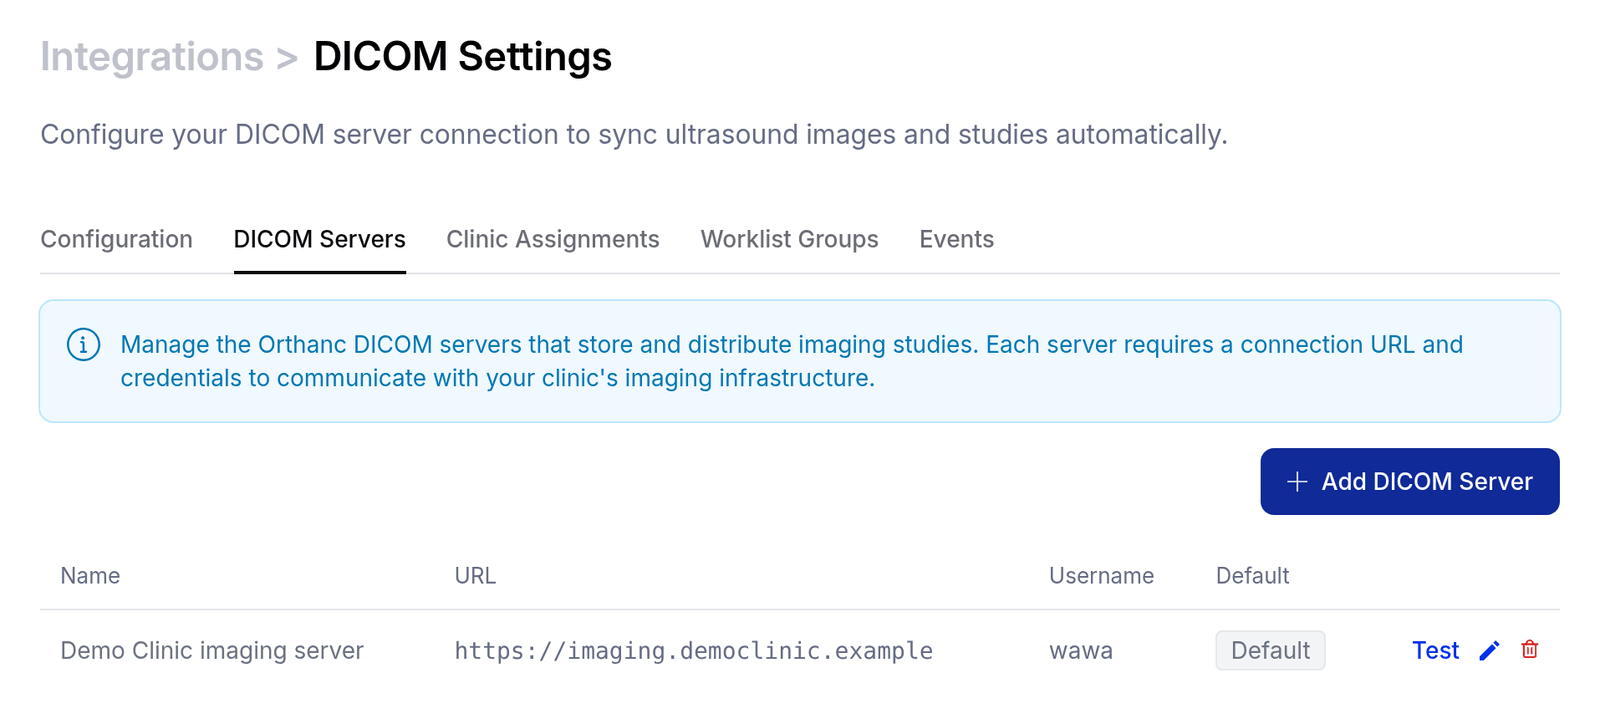
Connection
| Field | What to enter |
|---|---|
| Name | A name your team recognises, for example the site name |
| URL | The web address from your IT team, with nothing after it, for example https://imaging.yourclinic.example |
| Server answers to a different hostname | Leave off, unless your IT team gives you a name to enter |
| Username and Password | From your IT team. Type the password yourself |
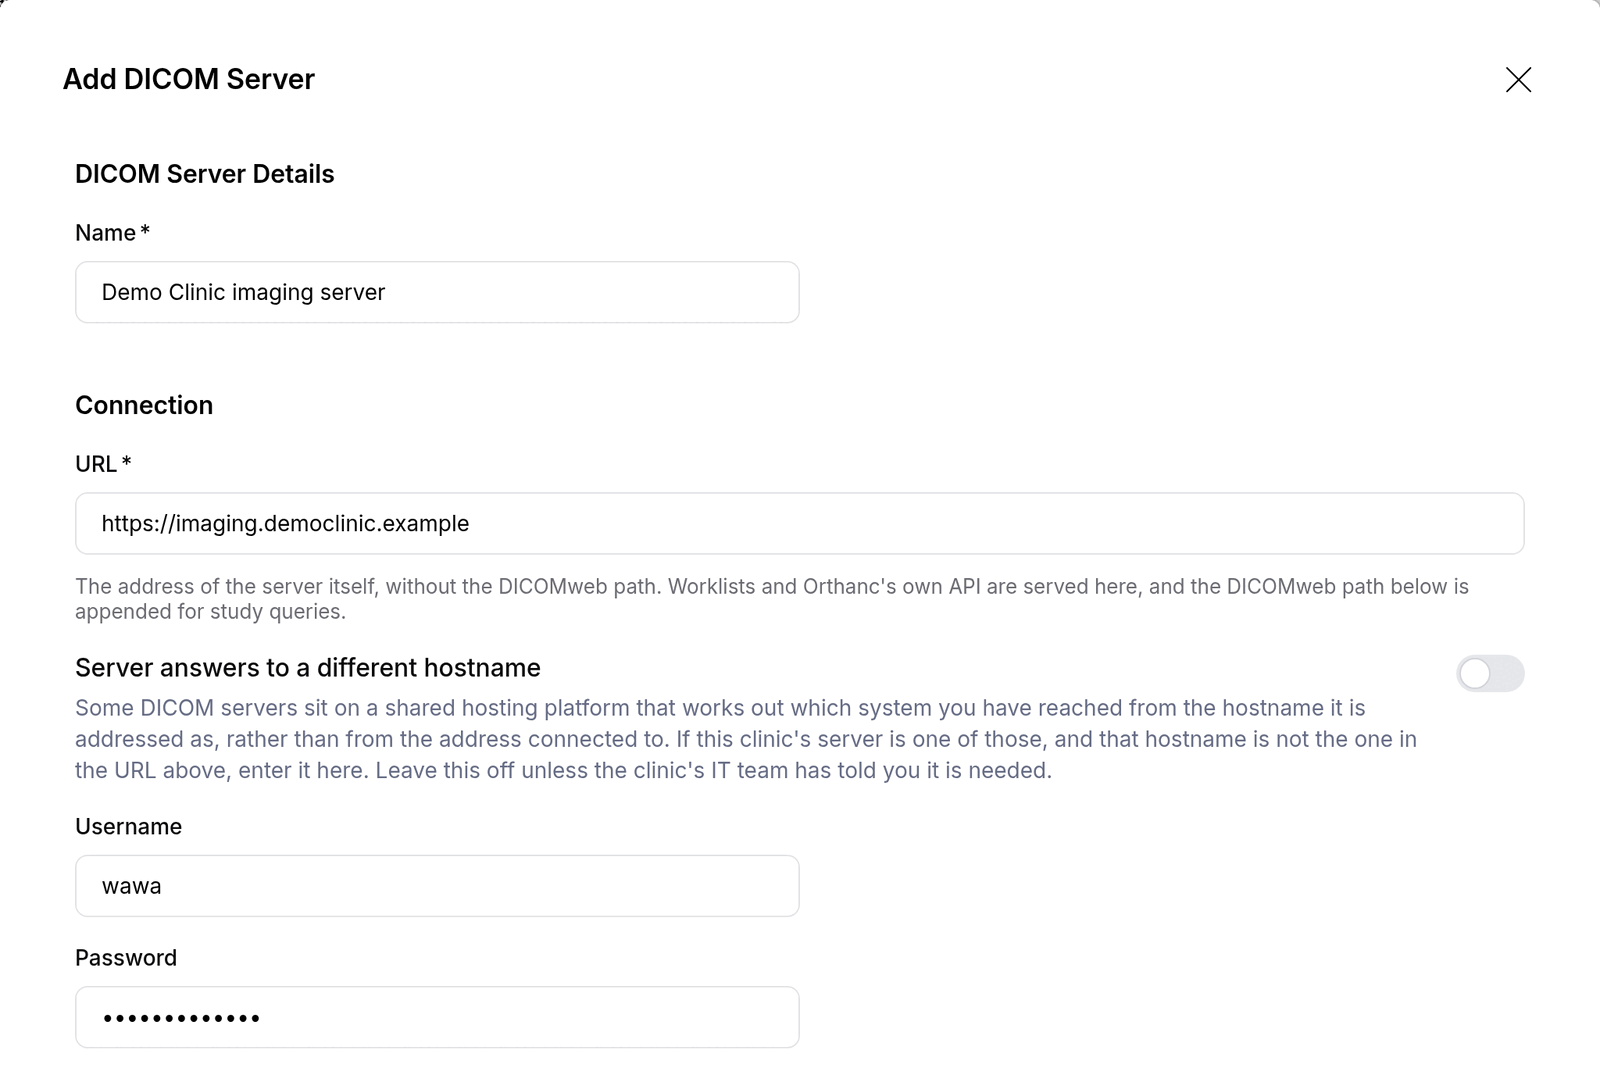
DICOM Configuration
| Field | What to enter |
|---|---|
| DICOM time zone | The time zone of the site. Check it rather than accepting what the form shows: wawa uses it for scan and appointment times |
| Strip from Patient ID | Leave blank unless wawa has told you otherwise |
| DICOMweb path, and the five paths below it | Leave exactly as wawa fills them in |
| Orthanc server | Tick if your IT team confirmed the server is Orthanc |
| Automatic synchronisation | Switch on so new scans arrive by themselves every few minutes (Orthanc only). Off, scans arrive only when someone clicks Fetch Scanner Reports |
| Default DICOM server | On for the server used by any clinic not given its own in Step 3. A single server is the default automatically |
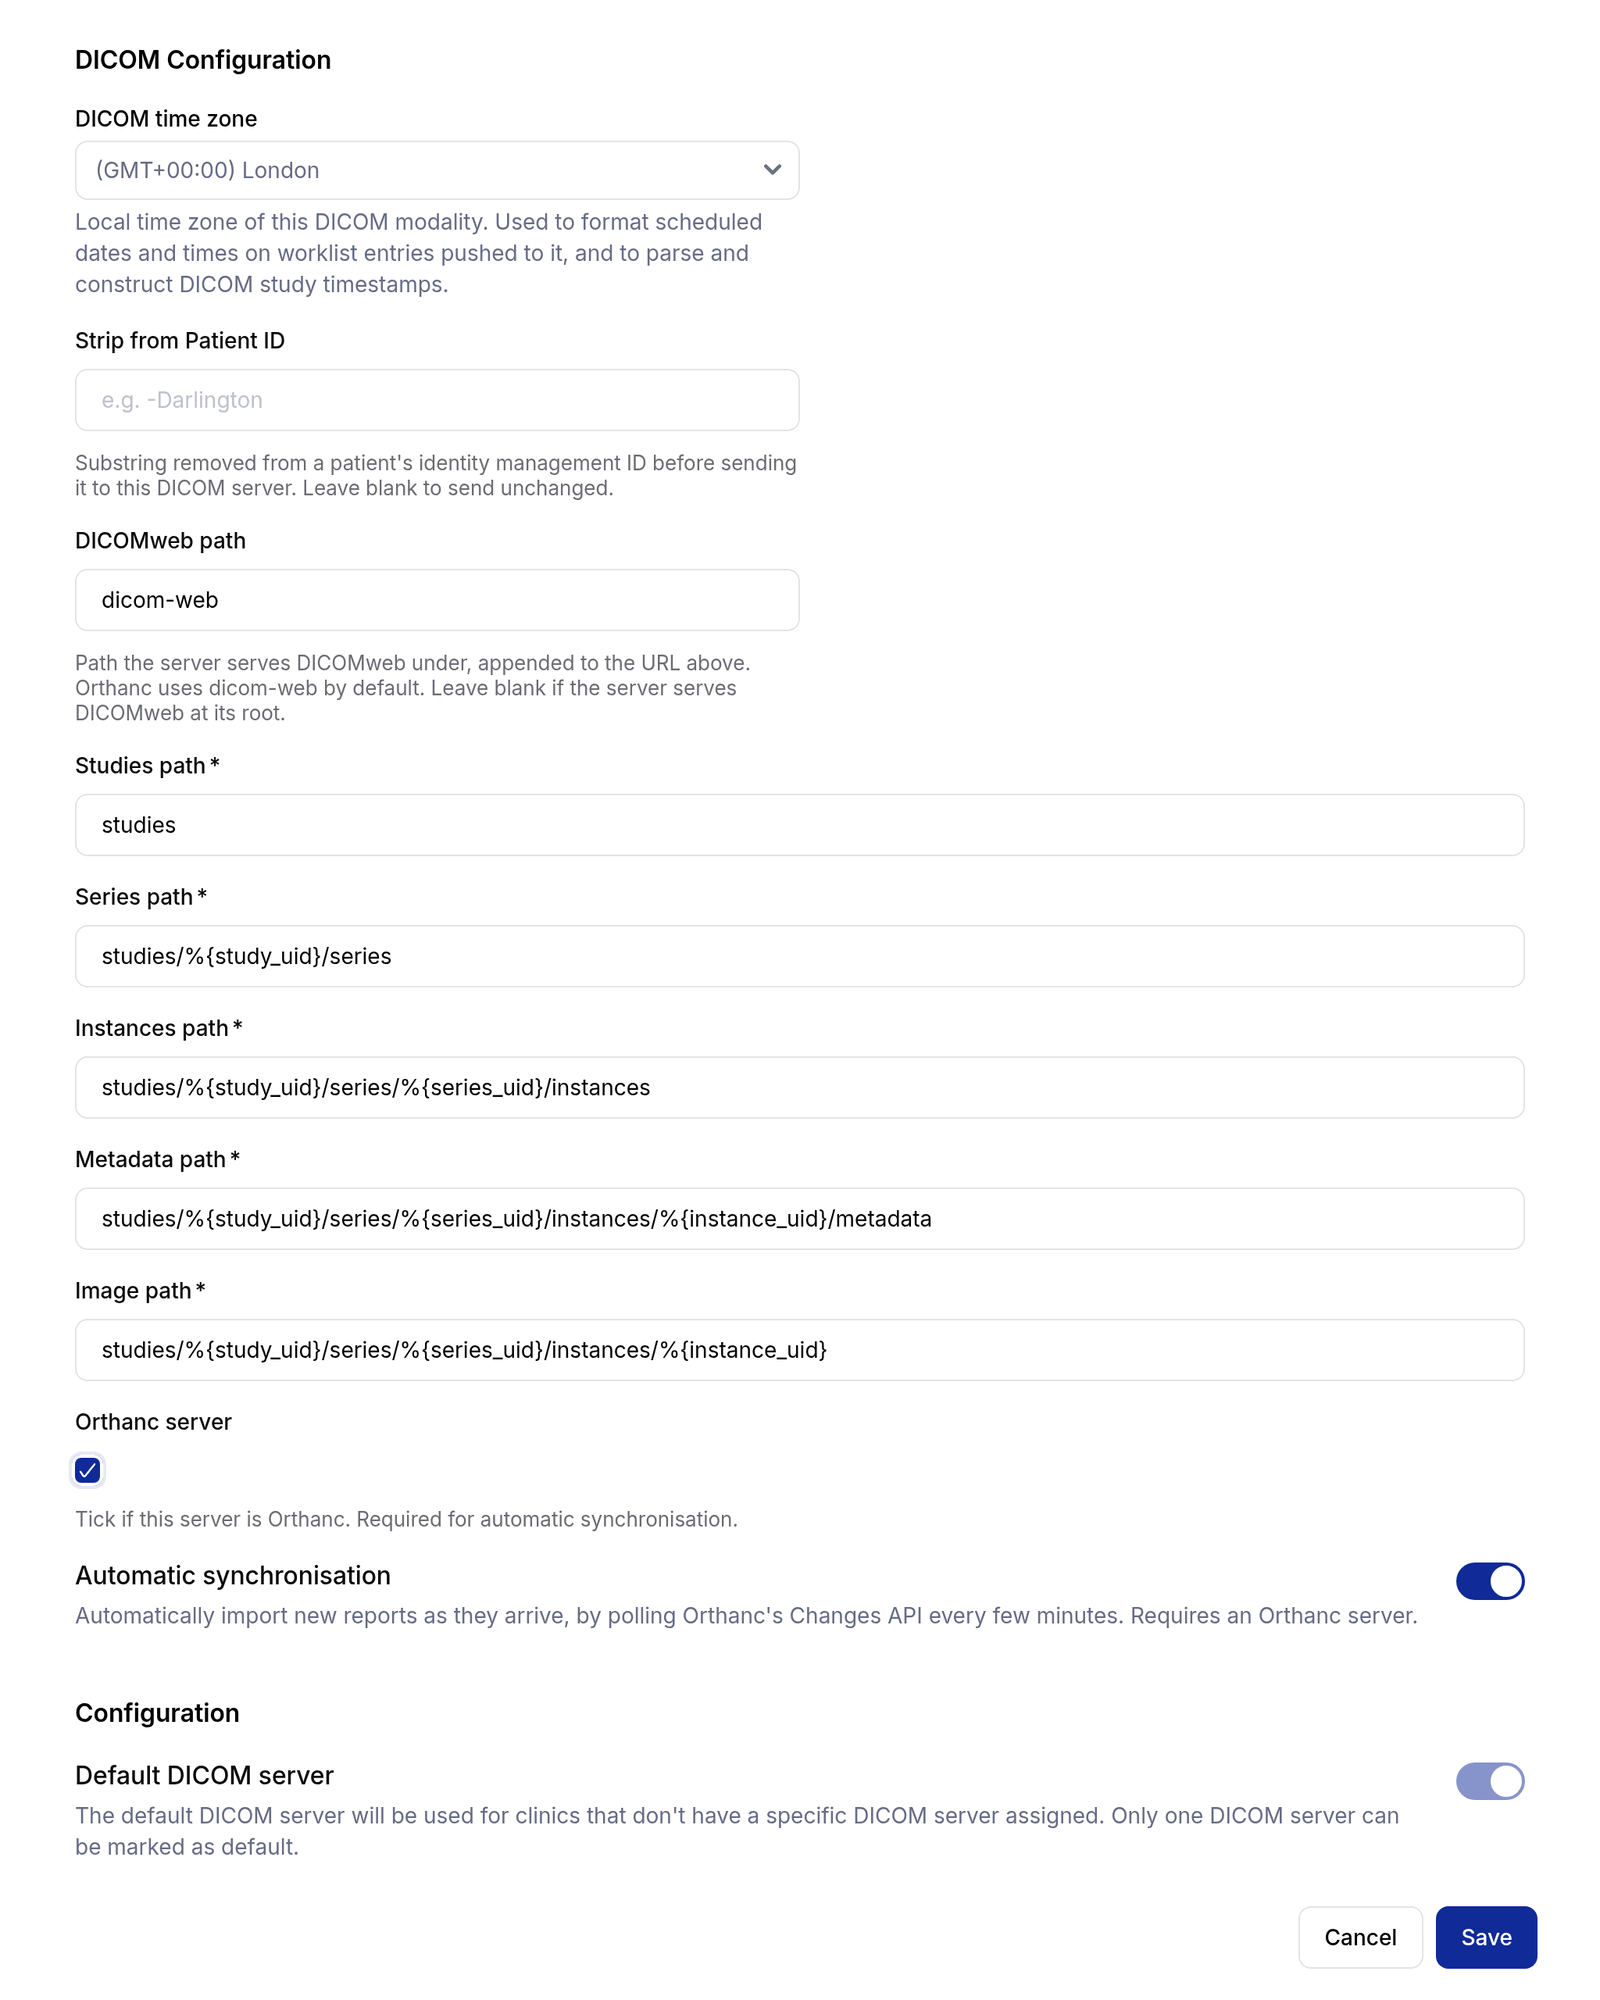
Click Save. If your organisation has several sites, each with its own server, repeat for each.
Step 3: Choose which server each clinic uses
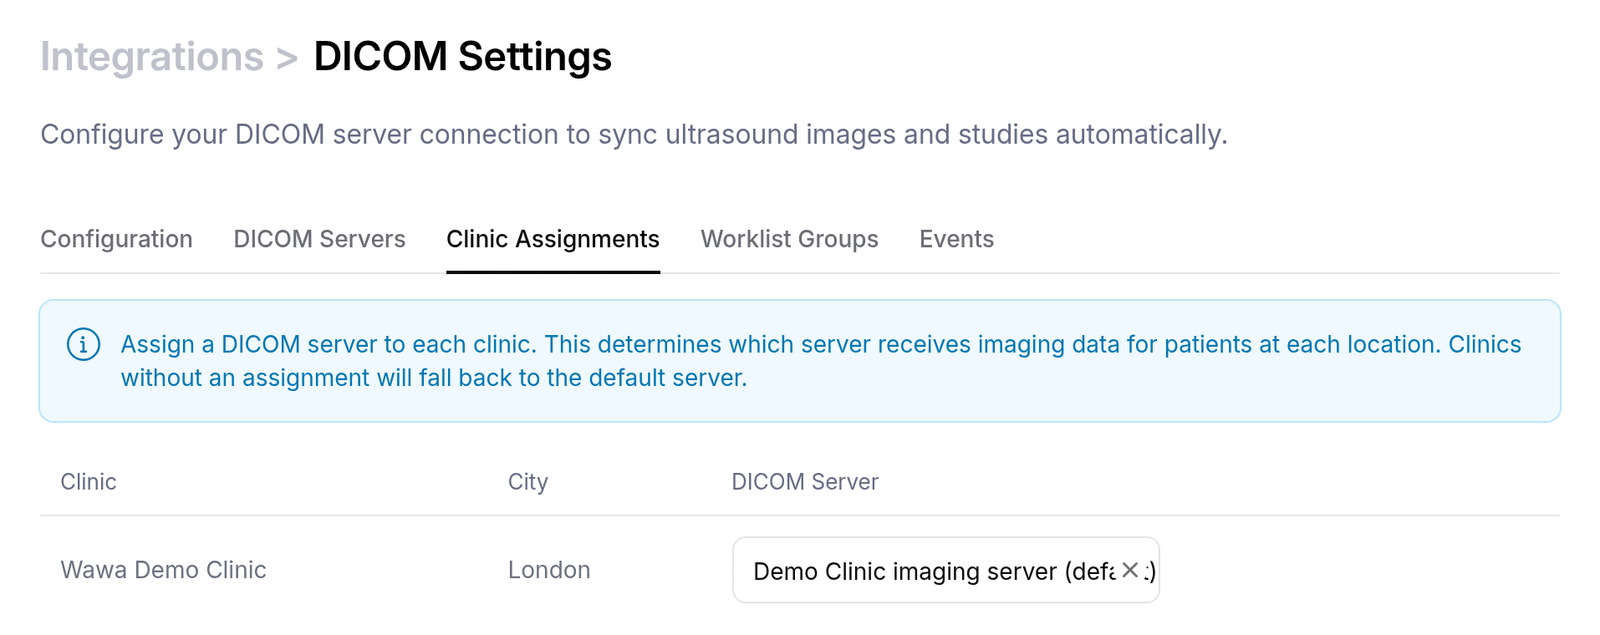
On Clinic Assignments, pick the server for each clinic in the DICOM Server column. The choice saves at once. Use default uses the default server from Step 2.
Step 4: Test the connection
On DICOM Servers, click Test next to the server.

| You see | It means |
|---|---|
| Green Connection successful | wawa can reach and read the server, even if no scans have been sent yet |
| Red Connection failed | Check the URL, username and password with your IT team; if they are right, send the full message to your wawa contact |
A passing test proves wawa and the server are connected. Only the test scan proves scans from your scanners reach wawa.
Step 5: Create a worklist group for each scan room
Only needed for worklists. The Worklist Groups tab appears once a server has Orthanc server ticked.
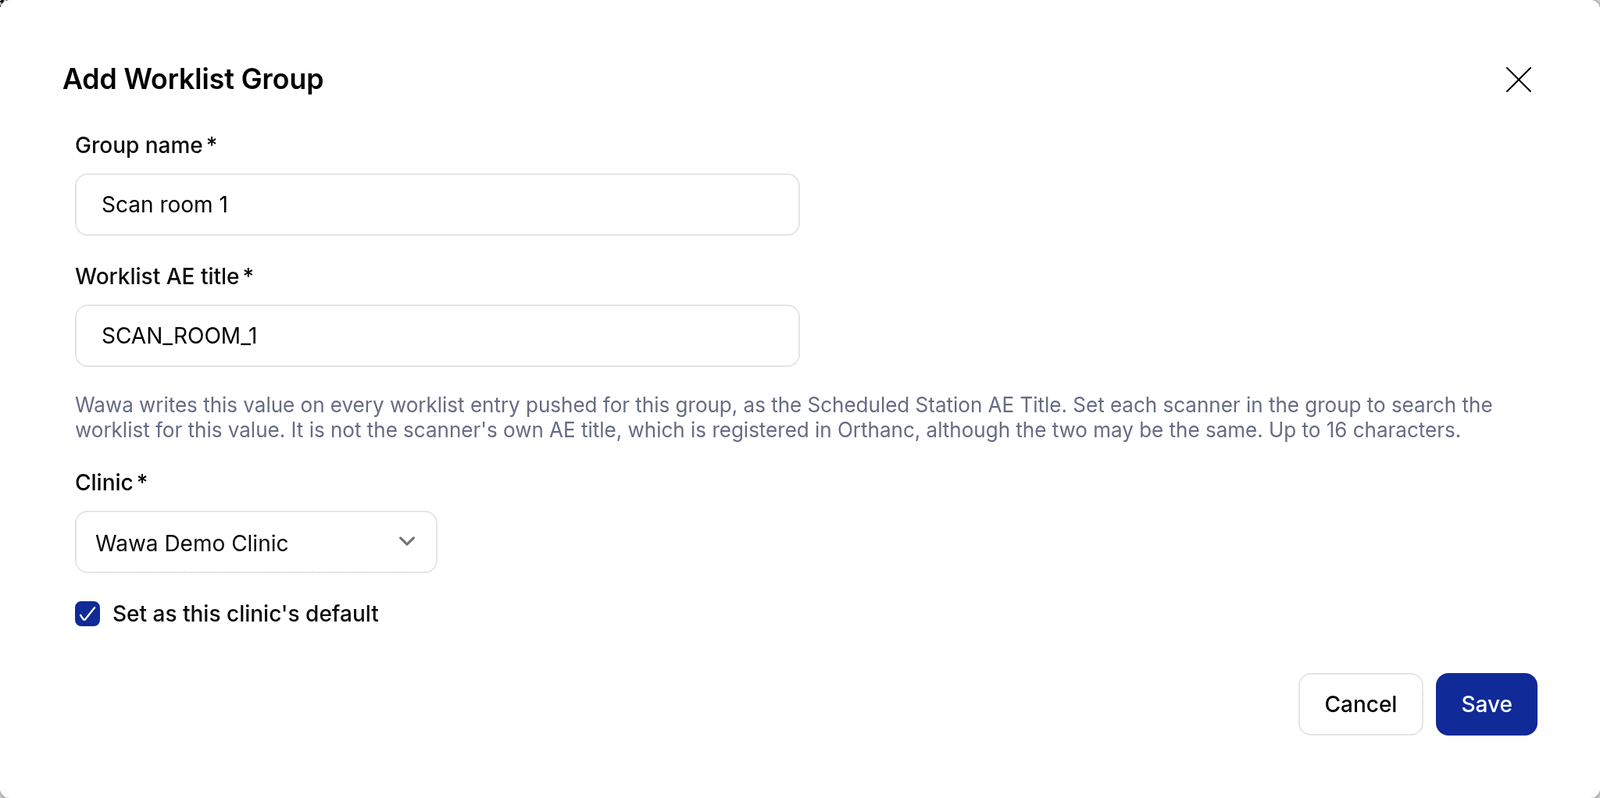
A worklist group decides which scanners see which booked scans. Its Worklist AE title is a short code; every scanner set to look for that code shows the group's bookings. Most clinics create one group per room; rooms that should see the same list can share one.
- On Worklist Groups, click Add Worklist Group.
- Fill in the form and click Save. Repeat for each room.
| Field | What to enter |
|---|---|
| Group name | For example Scan room 1 |
| Worklist AE title | For example SCAN_ROOM_1. Up to 16 characters, different for each group in a clinic. Use capitals, numbers and underscores only: some scanners reject other characters. Write it down: it is entered on the scanner in Step 11 and must match exactly |
| Clinic | The clinic the room belongs to |
| Appointment types | Optional. Appointments of these types booked at this clinic go to this group, with Send to Scanner Worklist ticked, for example embryo transfers and egg collections to a theatre group. Each type can go to one group per clinic. Adding a type also sends its upcoming appointments that are not on a worklist yet |
| Set as this clinic's default | For the group that receives scans booked without choosing one. A clinic's first group is its default |
Without one, its booked scans are sent to no scanner, and the Events tab says so. Create a group, then open and save each affected appointment again to send it.
Appointments already sent keep the old code until each is saved again. Ask your wawa contact to resend upcoming appointments.
Step 6: Mark your scan appointment types as ultrasound
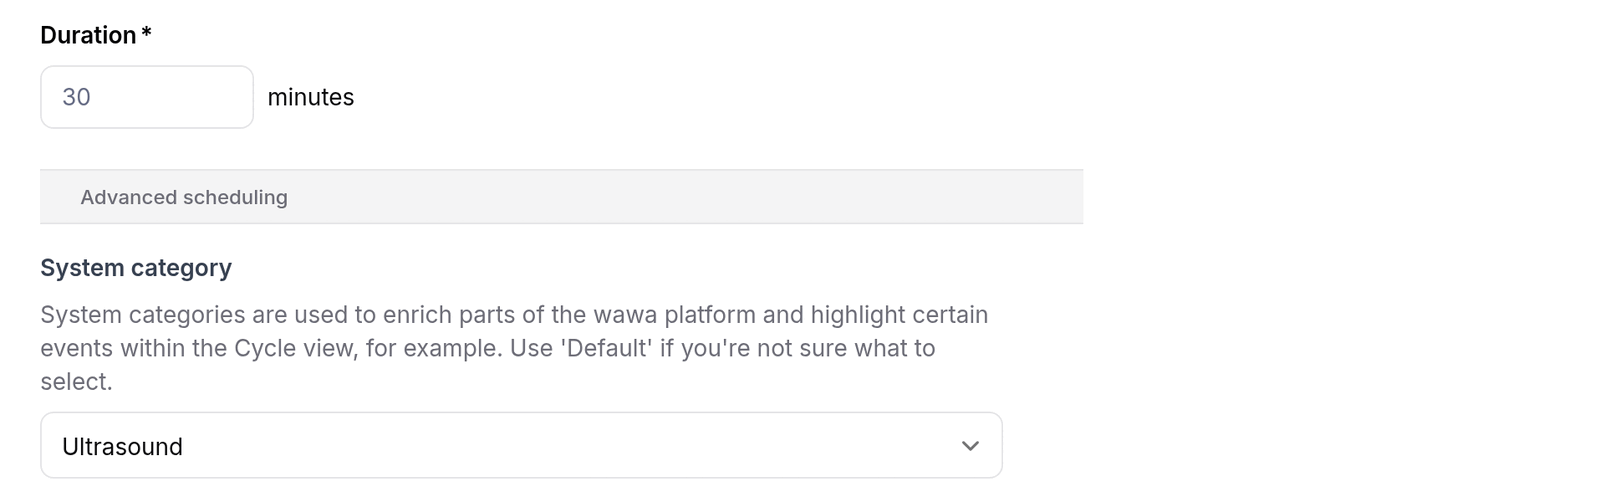
Appointments whose type is an ultrasound are sent to the scanners automatically. For each appointment type used for scans: Settings → Appointment types, open it, and under Advanced scheduling set System category to Ultrasound. Save. Upcoming appointments of that type are sent straight away.
Step 7: Book scans as usual
Each scan booked with an ultrasound appointment type is now sent to the scanners: the booking panel shows Send to Scanner Worklist ticked, with the worklist group preselected: the group that lists the appointment type, otherwise the clinic's default or its only group. Change the group if the patient is scanned in another room.
Appointments whose type is listed on a group arrive ticked and on that group, even if the type is not an ultrasound. Any other appointment can be sent too: tick Send to Scanner Worklist when booking it, or choose it from the appointment's More menu during the visit. Unticking it, or Remove From Scanner Worklist, takes it off the scanner.
Good to know:
- Moving an appointment updates it on the scanner; cancelling removes it.
- Appointments more than three days in the past are not sent.
- Once the scan has been received, the imaging server normally removes the patient from the worklist by itself.
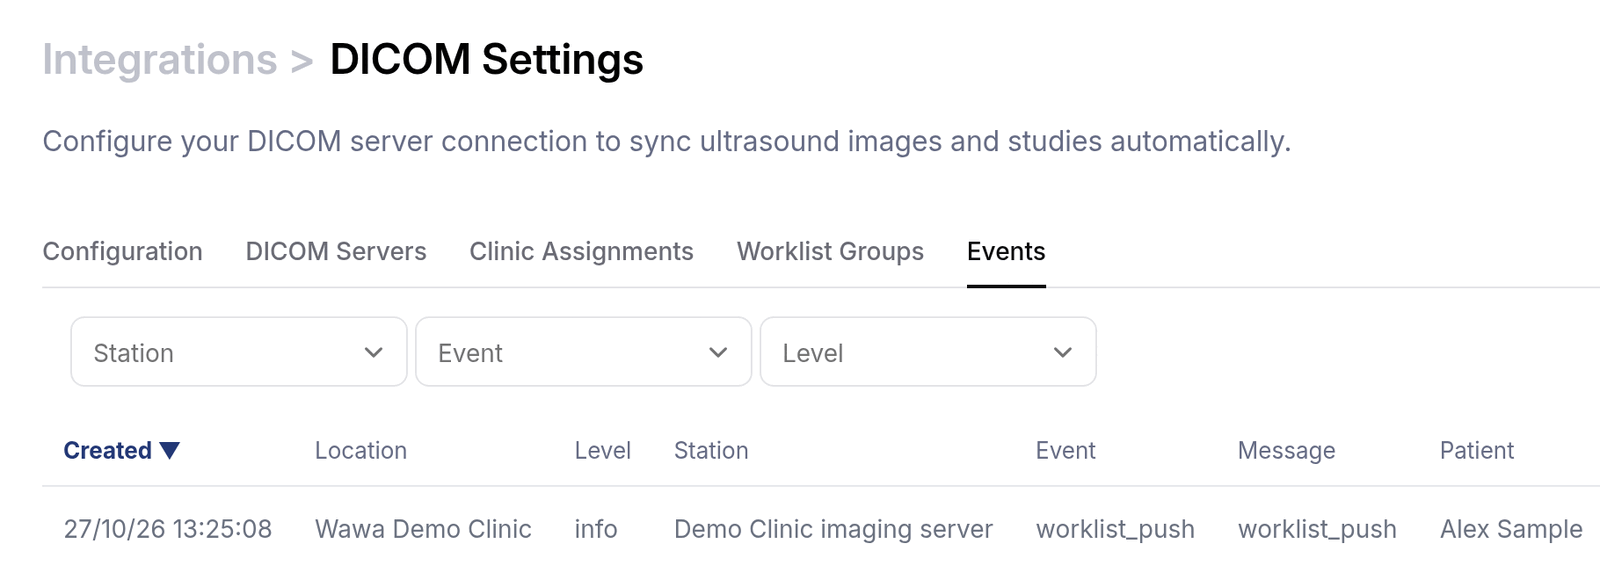
- The Events tab records every appointment sent to the imaging server, and any that could not be sent and why.
Part 2: Setting up each scanner
Done once per scanner, usually by the scanner supplier with your IT team.
The steps below were written against a GE Voluson P8. Other Voluson models (Performance, Swift, E series) follow a similar pattern, but menu names differ between models and software versions, and manufacturers change them. If your screens do not match, ask your scanner supplier for the equivalent settings, and follow the manufacturer's documentation for your equipment.
Whatever the make or model, every scanner needs the same three things, all pointing at your imaging server: somewhere to send images, somewhere to send measurements, and somewhere to read its worklist.
Step 8: Collect the details
| Detail | What it is | Example |
|---|---|---|
| Imaging server AE Title | The name the imaging server answers to | ORTHANC |
| Imaging server IP address | Its address on the clinic network | 192.0.2.20 |
| Imaging server port | The DICOM port it listens on | 4242 |
| This scanner's own AE Title | How the scanner identifies itself. Your IT team registers it on the imaging server so the scanner may read the worklist | US01 |
| Worklist AE title for this room | The code of the room's worklist group, from Step 5 | SCAN_ROOM_1 |
The first three are the same for every scanner on the same server.
The scanner's own AE Title says who the scanner is. The worklist AE title says which bookings it shows. Clinics often choose the same text for both, but they are separate settings, entered in separate places.
The scanners and the imaging server must talk over the clinic's private network. Port 4242 must never be reachable
from the internet.
Step 9: Connect the scanner to the imaging server
On the Voluson P8, press F2 and go to System Setup → Connectivity → Device Setup → DICOM Configuration. Create three services, mark each active, and save. All three use the imaging server's AE Title, IP address and port from Step 8.
| Service | What it does | Settings beyond AE Title, IP and port |
|---|---|---|
STORE | Sends the images | Alias: the server's AE Title · TLS: No (unless your IT team says otherwise) · Send sequ.: No |
STR.REPORT | Sends the measurements | As STORE, plus Combine OB & GYN: Yes · Include Scan Assistant Data: No · Include Private Measure Data: No · Private CSD Identifier: Mixed |
WORKLIST | Reads the booked patients | Alias: the server's AE Title · TLS: No · Private Tags: No · Modality: All · Add local data: No |
Each service has a Verify button, a DICOM handshake: it proves the scanner reaches the server, not that images arrive. A Ping button may also be there; many clinic networks block ping, so a failed Ping means nothing.
Step 10: Point the image key at the imaging server
On a Voluson, images are not sent automatically: the sonographer presses the programmable P1 key, so P1 must send to the imaging server.
- Go to System Setup → Connectivity → Button Configuration.
- For P1, choose the
STOREdestination created in Step 9. - Save.
If P1 sends nowhere, or still sends to an old destination such as a previous reporting system or PACS, measurements still reach wawa but images never do, on every scan from that scanner. Check P1 whenever a scanner is moved over from another system.
Step 11: Choose which worklist the scanner shows
Open the Worklists screen and enter this room's worklist AE title (for example SCAN_ROOM_1) in Station AE
Title. It must match wawa exactly. The scanner then shows only that group's bookings.
Part 3: Test before going live
Test every scanner, with the test patient only.
- In wawa, book an ultrasound appointment for today for the test patient, in that scanner's room.
- On the scanner, refresh the worklist. Check: the test patient appears with their details.
- Choose the test patient and run a short exam with a few images and some follicle measurements.
- Send the images (P1 on a Voluson).
- Send the measurements (on a P8, Measurements → Transfer Data).
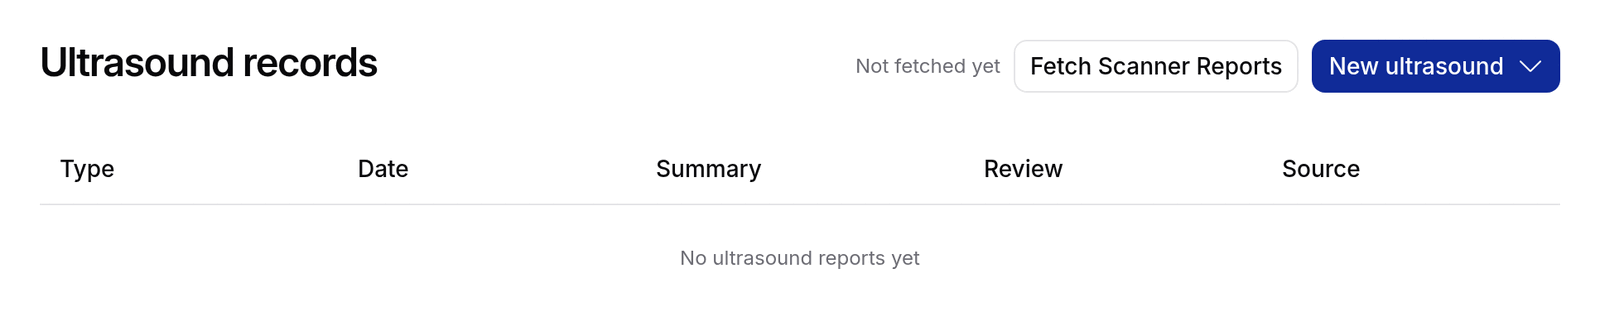
- In wawa, open the test patient's Records → Ultrasound and click Fetch Scanner Reports. Check: the scan is listed with both measurements and images. Images can follow up to an hour after the measurements.
When every scanner passes, write down on the quick reference which controls send the images and the measurements on each model, and show every sonographer the two sends.
Troubleshooting
| What you see | What to check | Who can help |
|---|---|---|
| No Worklist Groups tab | Orthanc server is ticked on the server (Step 2) | wawa administrator |
| Test shows Connection failed | URL (nothing after the address), username and password | IT team, then wawa |
| A patient is missing from the worklist | Appointment type is Ultrasound (Step 6), or Send to Scanner Worklist is ticked; the clinic has a worklist group (Step 5); the right group was chosen when booking (Step 7); the appointment is not more than three days old; the scanner's Station AE Title matches the group exactly (Step 11); the Events tab shows no skipped message | wawa administrator |
| No patients at all on one scanner | The scanner's own AE Title is registered on the imaging server, and its WORKLIST service is right (Steps 8, 9, 11) | IT team and scanner supplier |
| Appointments of one type keep arriving on the wrong room's scanner | Which worklist group lists that appointment type under Appointment types (Step 5). Appointments already sent keep their group: change it on each one | wawa administrator |
| A patient shows on one scanner but not another | The scanners look for different worklist codes. Correct if they are in rooms with different groups | wawa administrator |
| Every scan from one scanner has measurements but no images | P1 does not send to the imaging server: unset, or still pointing at an old destination (Step 10). Fix it, run a test scan, then re-send the affected exams | Scanner supplier, or whoever looks after the scanners |
| Some scans have images and some do not | The setup works; P1 is being skipped. Show the sonographers the two sends, and re-send the affected exams | Lead sonographer |
| Measurements arrived but images are not showing yet | wawa downloads images in the background; allow up to an hour before treating them as missing | |
| A scan shows Measurements pending | The measurements were sent (on a P8, Measurements → Transfer Data); it is a follicle-tracking or pregnancy scan. Measurements for a scan from the last 30 days are picked up by themselves; after that, wawa has to import them | Sonographer, then wawa |
| A scan does not appear in wawa at all | The images or the measurements were sent; the patient was chosen from the worklist (or the wawa ID typed exactly); automatic synchronisation is on, or Fetch Scanner Reports was clicked | Sonographer, then wawa |
| You are not sure which scans are affected | The Debug tab in the DICOM settings (Orthanc only) compares a day's studies on the imaging server with wawa and gives the likely reason for each. See Debug tab | wawa administrator |
| Past scans arrived without images | Re-send those exams from the scanner's archive with P1, and tell wawa the dates and scanners. Recent exams are picked up by themselves; older ones may need wawa to import them | Sonographer and wawa |
When you contact wawa, give the patient's wawa ID (not their name), the date and time of the scan, the scanner or room, and what you expected to see. Never send patient details or passwords by email or chat.
Responsibilities and support
wawa provides guidance on the settings a clinic's imaging server and scanners need to work with wawa. wawa does not install, administer, maintain or secure imaging servers (including Orthanc), ultrasound scanners or clinic networks; these remain the responsibility of the clinic's IT department, its technology providers and its scanner supplier. Scanner settings in Part 2 are an example based on one model: always follow your manufacturer's documentation and your supplier's advice.
If anything here does not match what you see, tell your wawa contact so the guide can be corrected.